
Every day security vulnerabilities in apps create risk for potentially exploitable paths that a malicious actor might attempt to use in order to compromise a device in your infrastructure. To prevent this, you can use Microsoft Defender to apply policies and profiles that secure specific portions of the endpoints, reducing their “attack surface”, and improving your security.
In this post, we’re going to show you how you can do exactly that. Limiting the attack surface ensures endpoint security as it blocks these possibly insecure paths and decreases the likelihood of a security breach through an endpoint.
Let’s jump in.
There are several ways to reduce your endpoint attack surface in Microsoft Defender. For example, you can:
- Use application control to limit the types of apps that can run on machines in your environment
- Control folders in which applications or users have access to
- Control the types of devices that are allowed to be written to
In this post you’ll see an example of how to create an attack surface reduction rule using Microsoft Endpoint Manager and limit the attack surface on an endpoint in your environment.
Creating An Attack Surface Reduction Rule in Microsoft Defender
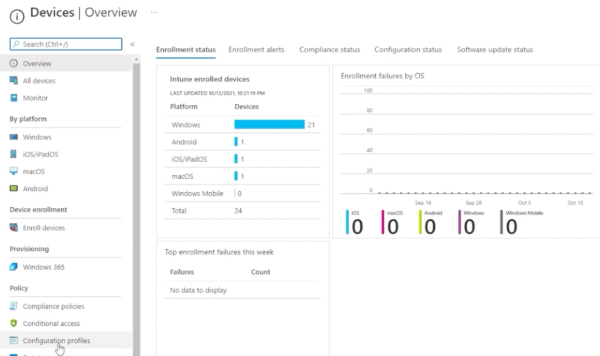
First, access your Endpoint Manager portal by going to endpoint.microsoft.com.

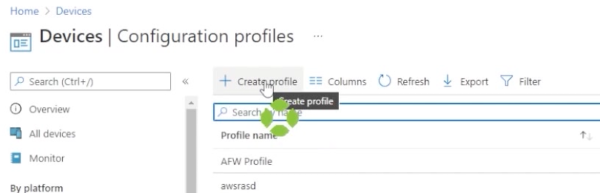
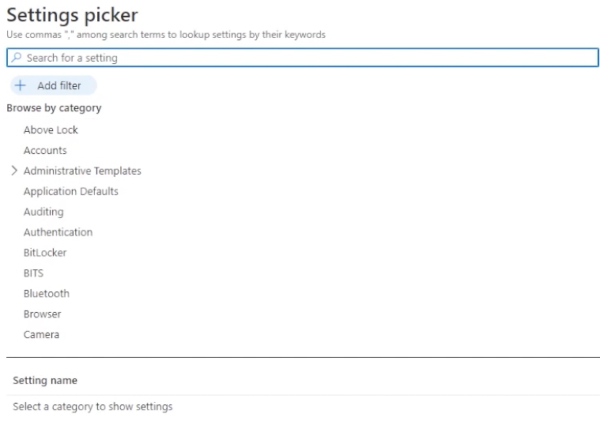
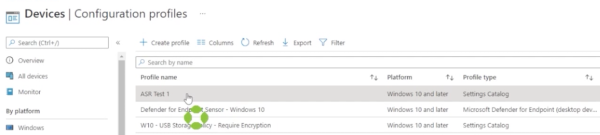
Go to devices, then down to configuration profiles. Here you see a list of profiles already created.
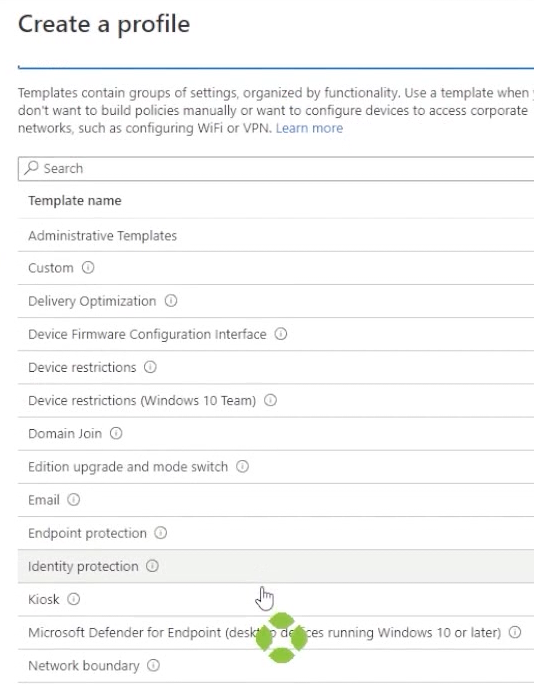
You can either modify one of these or choose to create a new profile. If you, drop down profile type, from here you can either choose from one of the templates provided or choose “Settings Catalog” which will essentially create a blank slate.
Hit create. Now you can give it a name.
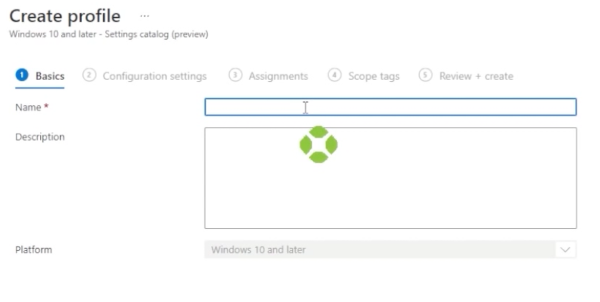
Once you do, go down and hit next. Select add settings. In here, you’ll see that we have a lot of settings to choose from.
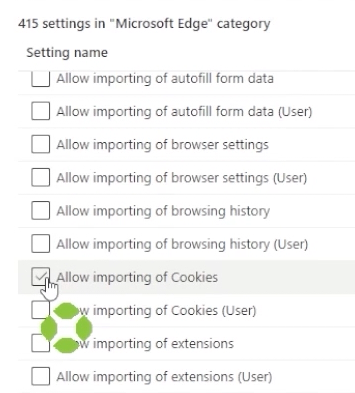
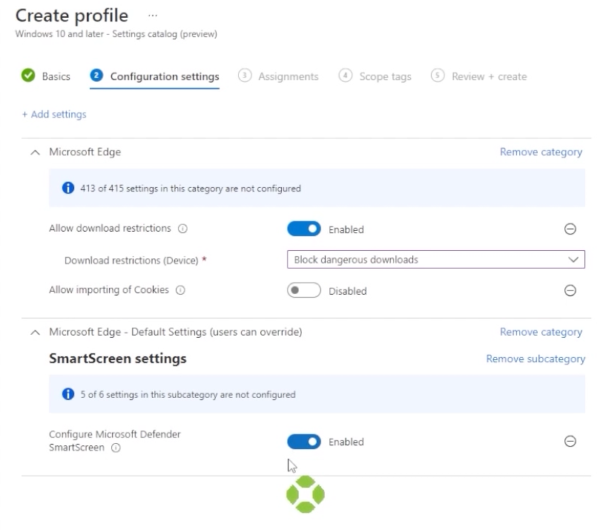
For this example, let’s use Microsoft Edge and select “Allow Download Restrictions” and “Allow Importing of Cookies.”
Let’s also drop down the Microsoft Edge default settings to “User can Override.”
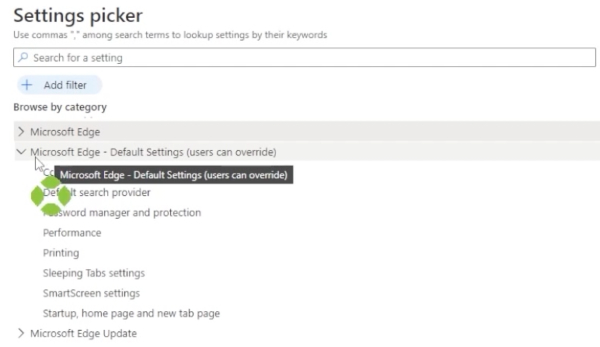
Next, go to smart screen settings. Here you can add “Configure Microsoft Defender Smart Screen.”
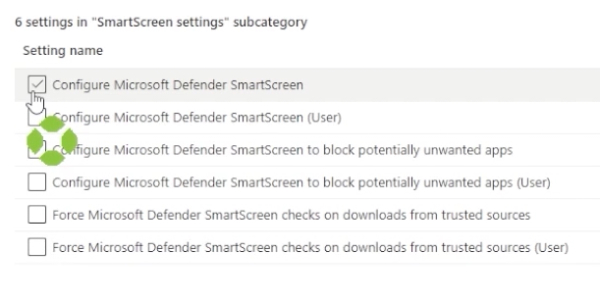
Close that window, and select “Enable Allow Download Restrictions.” That’s going to block dangerous downloads. As for allow importing of cookies, leave that disabled. Also enable “Configure Microsoft Defender Smart Screen.”
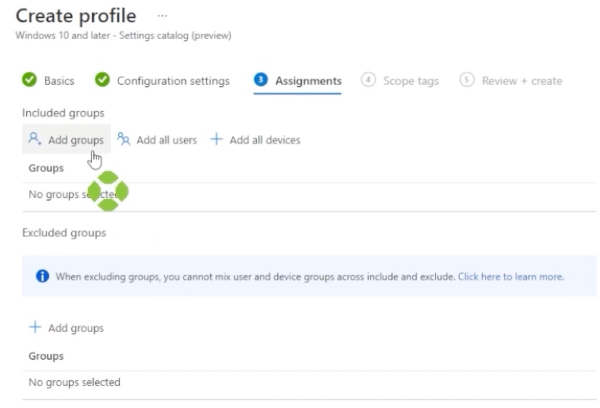
Click next. Once you get here, choose to add a group. Choose the group that includes the devices that you want to include. Once you’re satisfied with the assignments, click “Next” an “Create.”
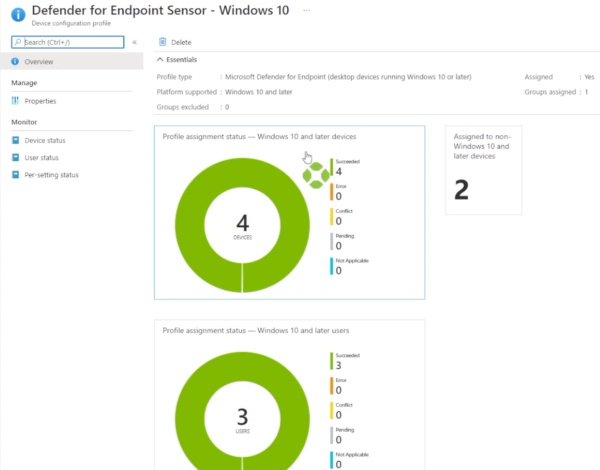
Now your ASR test one configuration profile has been created. You can click on that profile to check in on it, and once the members of the group have received the configuration profile and start reporting information back, we’ll see whether or not there are successes, errors, or conflicts.
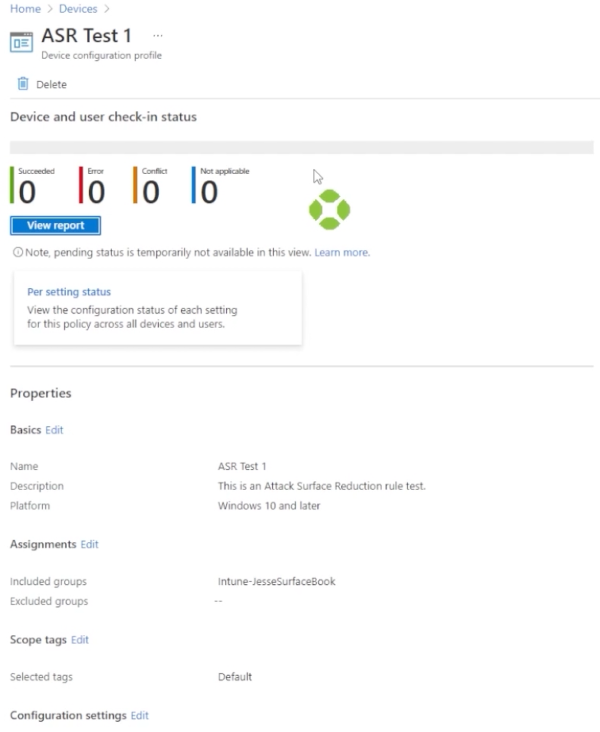
For example, let’s go back and select a profile that we created in the past, and we’ll see that we have an overview report with information regarding whether or not this profile has been applied and the overall success or failure.
And that’s how to create an Attack Surface Reduction Rule in Microsoft Defender.
To find out more about how model technology solutions can help reduce your attack surface on your endpoints, please contact us at www.model-technology.com. You can also check out the Microsoft Documentation for Attack Surface Reduction here.