Hey there everyone! Today I wanted to talk about customizing the Windows 8.1 Start screen during OS deployment with SCCM 2012.
I often see this question come up and witness many deployments of Windows 8.1 with the cluttered (in my opinion) default Start Screen. Given most end users really only care about getting quick and easy access to their Line of Business apps (well.. and Facebook if we are being real). The default Start Screen can be quite overwhelming and even downright confusing to new users of Windows 8.
With Windows 7, it was relatively easy to Pin/Unpin applications to the Start Menu using scripts that invoke the native verbs. We very quickly realized however that this no longer worked with Windows 8.1 (and 8.0, but is anyone really deploying that?).
Although not as flexible as Windows 7, there are indeed ways to customize the Start Screen. Microsoft has provided us with a couple of nice PowerShell cmdlets to assist:
Export-StartLayout
Import-StartLayout
Utilizing these two cmdlets, you can create your own custom Start Screen (from a reference machine) and import it at deployment time during your SCCM Task Sequence, resulting in all user profiles getting your mean, clean, Start Screen upon first login. Lets do a walk-through of this scenario shall we?
Note: The following process only sets the default configuration. It does not restrict users from adding/removing application pins or changing the layout of the Start Screen moving forward. If you want to have a more static approach, you can use Group Policy to force a specific Start Screen configuration.
As referenced above the PowerShell cmdlet Export-StartLayout allows us to pre-configure a Start Screen just how we like it, then export that configuration for use in our deployment process. Head over to a Windows 8.1 machine (any of your existing 8.1 machines will do) and start configuring apps you want pinned, and the overall layout!
You can install any number of applications you have in your environment and Pin the apps to the Start Screen on the reference machine, even if you do not deploy these applications during OSD. If the application in not installed on the target machine during or after OS deployment, the shortcut will simply not exist on the Start Screen. If said application(s) are installed during or anytime after the OS deployment the shortcut will magically appear. Magic you say! Of course its not real magic, the start layout file simply knows which shortcuts should be there and will only apply them when the underlying application is present.
Note: As shown in this post, you should create an x86 and a x64 layout respectively. There are many cases where one layout file for a particular architecture simply does not apply with the same results on the opposite architecture. To save yourself any grief in the future, I recommend creating both if you deploy both OS’s and using the PowerShell script below, simply apply the correct one at deployment time.
Here is my configured Start Screen on my Windows 8.1 x64 reference machine:
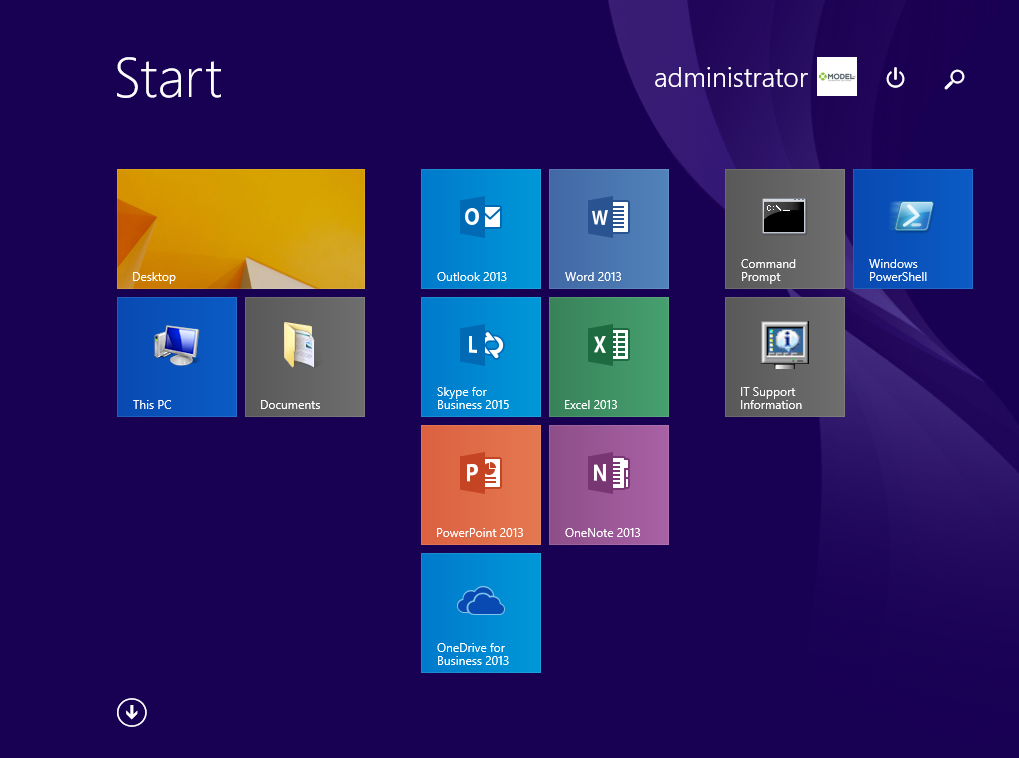
You may have noticed that I have an application pinned called IT Support Information. This is, as you might have guessed by the icon, a BGInfo application. Many IT professionals like to include BGInfo in their build process with the information appearing on the desktop wallpaper. Unless the background is restricted however, the wallpaper can be easily changed negating this functionality. In addition, the info on the wallpaper can become stale. By using the popup function of BGInfo, I can simply instruct my users to click the icon, giving me real time info about the computer. Here’s and example of this:

I install this on my reference machine to ensure the Start Screen shortcut is captured, this way when I install it during my OS deployment Task Sequence the shortcut will be available for all users.
Next I open a PowerShell window as Admin and execute:
Export-StartLayout -Path C:\MyCustom-StartScreenx64.bin -As BIN
I then repeat the process of configuring the Start Screen on my x86 reference machine, then open a PowerShell window as Admin and execute:
Export-StartLayout -Path C:\MyCustom-StartScreenx86.bin -As BIN
Note: In the links to the cmdlets above you will see that you can also export the StartLayout in XML format. This format is used in different scenarios, such as GPO deployment. In this post we focus on the BIN format.
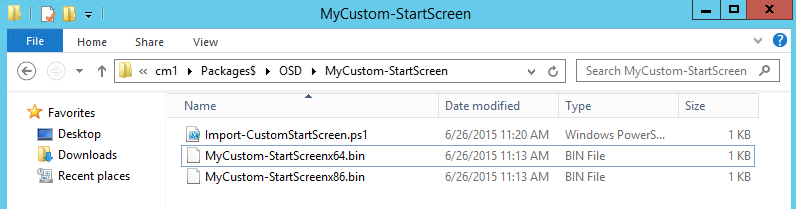
Now I create a quick PowerShell script that I will execute as a Task in my Task Sequence(s).
#-------------------------------------------------------------

#

# Import Custom Start Screen - Windows 8.1

#

#-------------------------------------------------------------

# Function: Write to Log

Function WriteLog ($LogFile, $LineOfText)

{

$date = Get-Date

Add-Content $LogFile "$date - $LineOfText"

Write-Host "$date - $LineOfText"

}

$StartScreenLog = "$env:TEMP\StartScreen.log"

WriteLog $StartScreenLog "OS Architecture: $ENV:PROCESSOR_ARCHITECTURE"

If ($ENV:PROCESSOR_ARCHITECTURE -like "*64*")

{

WriteLog $StartScreenLog "Importing x64 Start Screen"

Import-StartLayout -LayoutPath "$PSScriptRoot\MyCustom-StartScreenx64.bin" -MountPath $env:SystemDrive\

}

Else

{

WriteLog $StartScreenLog "Importing x86 Start Screen"

Import-StartLayout -LayoutPath "$PSScriptRoot\MyCustom-StartScreenx86.bin" -MountPath $env:SystemDrive\

}
Next I create my source code directory for my SCCM Package that I will create, then copy both my .bin files and my PowerShell script into it.
I am now ready to create my SCCM Package!
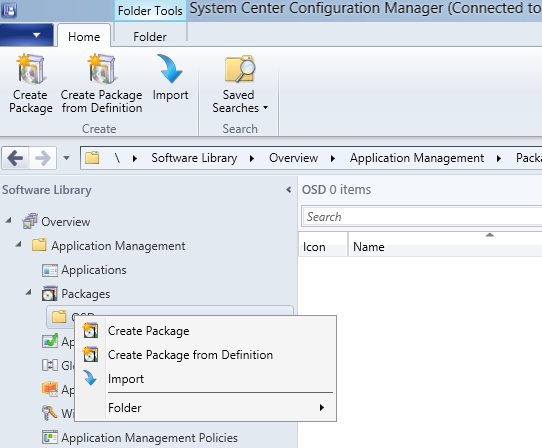
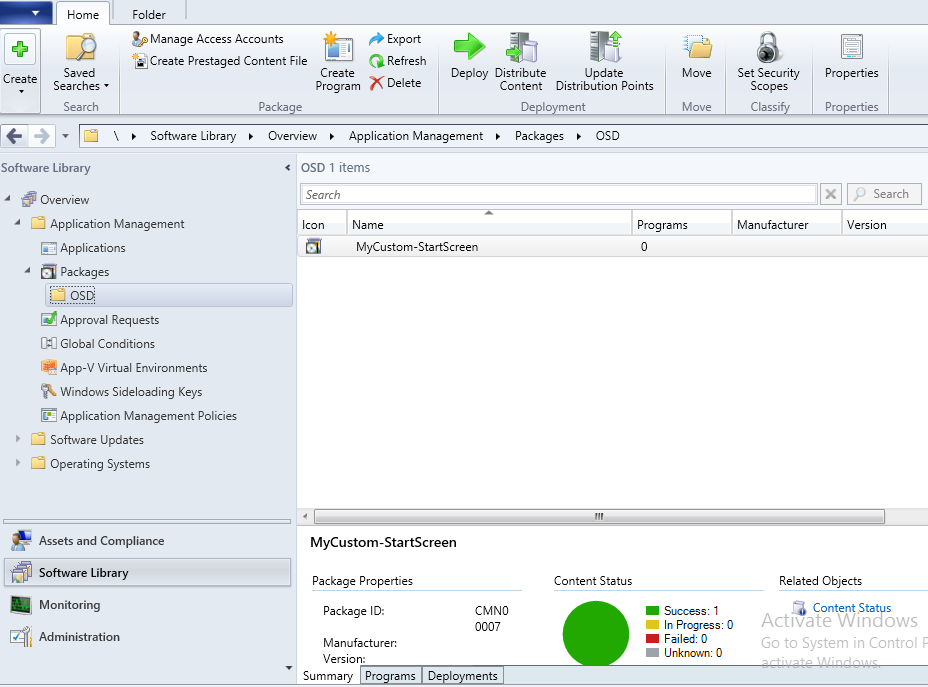
From my SCCM Admin console I navigate to Software Library > Application Management > Packages. In my environment I have created a sub folder of Packages called OSD. This is where I will create my new Package.
I right-click OSD and select Create Package.
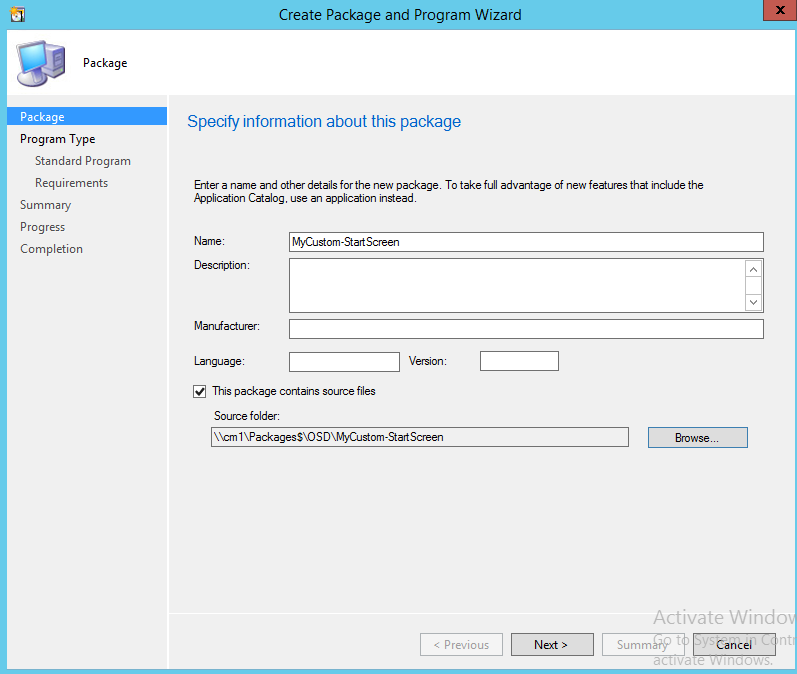
I give it a friendly name and select “This package contains source files”, then click Browse.
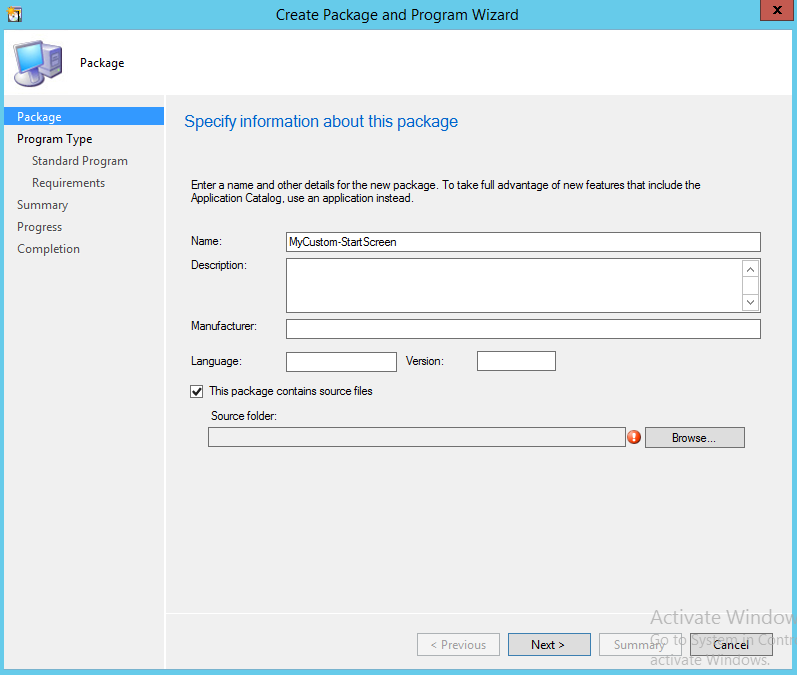
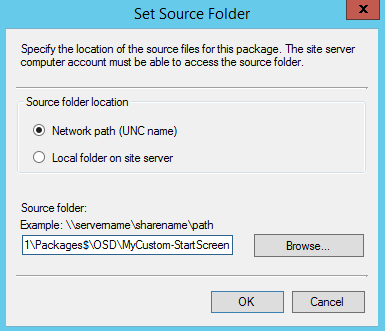
I enter the UNC path to my new source folder and click OK.
I then click Next.
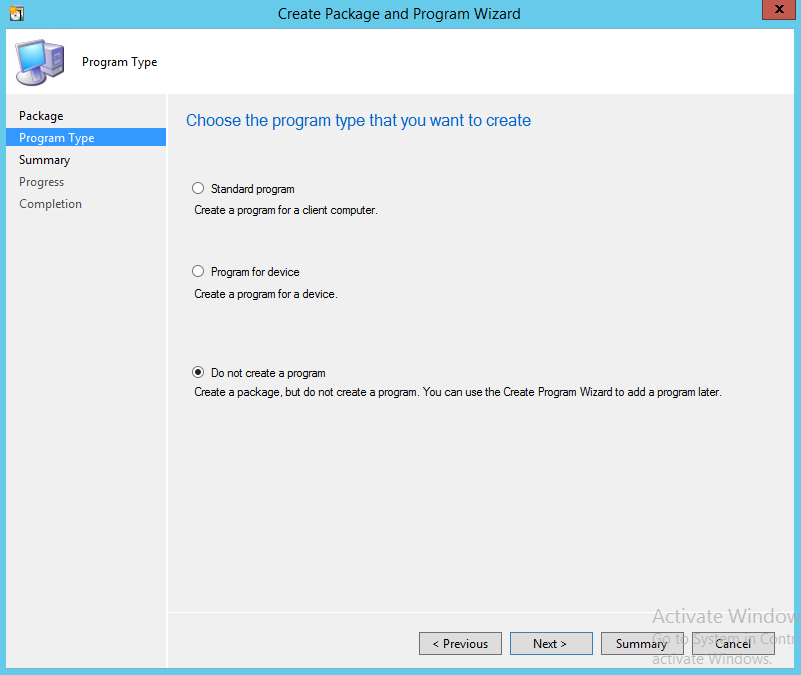
I select “Do not create a program” as I will call the PowerShell command directly in the Task, and click Next.
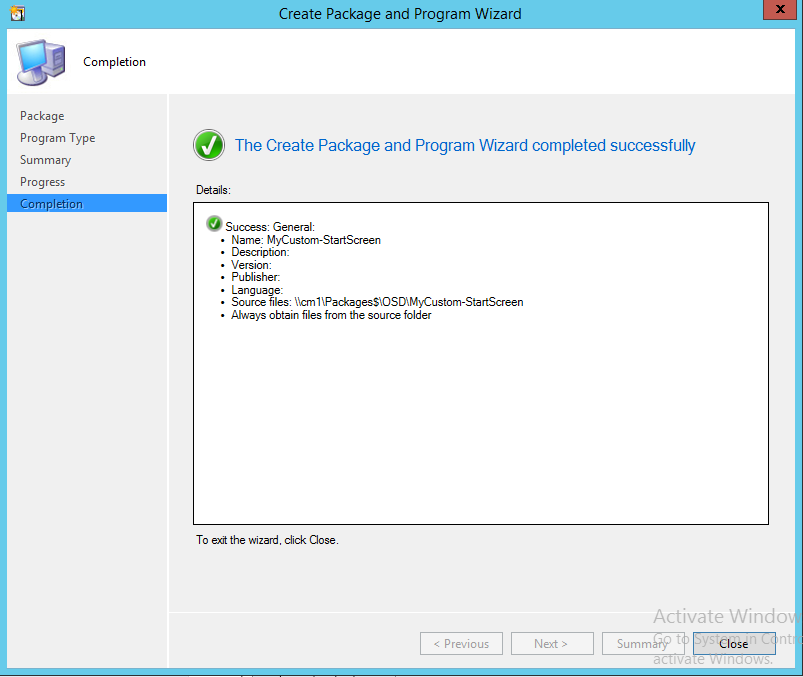
I click Next to confirm my settings.

And finally I click Close.
Before I modify my Task Sequence I will distribute the package to my Distribution Points and verify the content status is successful. 🙂
Time to edit my Task Sequence!
In the State Restore phase I create a Custom Group for my own ease of use, then add a new Run Command Line task:
Powershell.exe -executionpolicy bypass -file Import-CustomStartScreen.ps1
I select the package checkbox and choose my newly create package.
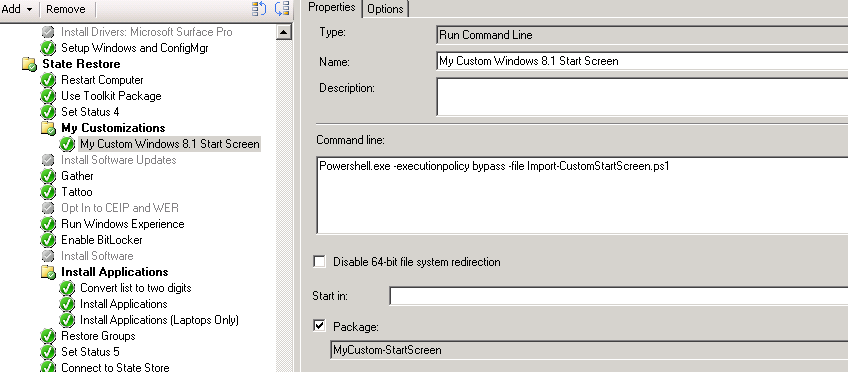
Note: Since I am running this in the State Restore phase (i.e. within the OS) I did not have to add PowerShell support to my Windows PE boot image.
Last thing to do now is deploy my updated Task Sequence, then login to the machine and verify my custom Start Screen is applied. As expected, my custom start screen appears for any new user profiles. 🙂

Because I installed my IT Support Information application as part of my Task Sequence, the shortcut does indeed show up. If I were to uninstall this application, the shortcut would disappear. If I then re-installed this application, the shortcut would reappear, then if I unins.. well you get the idea.
Well there you have it, a pretty easy way to customize and deploy your own Windows 8.1 Start Screen. Your users will thank you!