Summary
Microsoft’s official documentation on managing SCOM’s service accounts lacks any instructions on updating the Data Warehouse Write account credentials. This post contains detailed instructions on how to perform that operation.
Introduction
Recently at a client, I had need of changing the credentials used by SCOM’s array of service accounts. Unbeknownst to the current administrators, their SCOM environment had originally been installed and configured to use a single domain account across all of SCOM’s different functions. As the best practice is to configure separate accounts for each required service account function and to configure each account with the least permissions required to do its job, the client’s configuration was a poor security practice, even if it technically worked. What necessitated the change, however, was that the account being used was specifically tied to a decommissioned application and there were plans to disable and remove that account entirely. In order to keep SCOM functioning and reduce the potential for confusion in the environment, the decision was made to update SCOM’s service accounts and align them with best practices.
Fortunately, it wasn’t terribly challenging to have a collection of new service accounts created. Additionally, between Microsoft’s official documentation on changing the accounts (here), community documentation on required account permissions (here), and comparing the new accounts’ permissions to the respective service accounts’ permissions in a fresh lab SCOM 2012 R2 environment, manually configuring all the permissions the new accounts required went smoothly.
When it came time to perform the switch-over from the old account to the new ones, however, we ran into a curveball – Microsoft’s official documentation on updating the service accounts’ credentials (detailed in the sub-pages of this Technet article) contain zero instructions or guidance on how even to change the Data Warehouse Write account’s password, let alone change the credentials entirely.
Naturally, I decided to go ahead and figure it out on my own and blog about the results for the benefit of the community. I’m going to break the results up into separate instructions for changing the existing account’s password and changing the credentials being used entirely, as the latter requires several additional steps. So, without further ado, below are the steps necessary to update or change the credentials of the Data Warehouse Write account:
How to Change the Existing Account’s Password
The steps to update the password alone for the existing Data Warehouse Write account are mostly straightforward with one tiny catch. SCOM stores the credentials for the Data Warehouse Write account within a Run As Account. In order to update the password SCOM attempts to use with the account, all one needs to do is update the Password field in the appropriate Run As Account. The “tiny catch” is knowing which account to update.
When service account best practices are used when initially deploying SCOM (meaning a separate service account for each service account role), SCOM will create a Run As Account titled “Data Warehouse Action Account” which will contain the Data Warehouse Write account credentials. This Run As Account is mapped to several Run As Profiles which in turn are tied to SCOM’s Data Warehouse workflows.
However, if, when SCOM is installed, the same credentials were provided for both the Data Reader and Data Warehouse Write accounts, SCOM will not create separate Run As Accounts for each role. Instead, it will store the supplied credentials in the Run As Account titled “Data Warehouse Report Deployment Account” and map that single Run As Account to all of the Run As Profiles for both the Data Warehouse workflows and Report Server workflows.
As such, the steps to update the Data Warehouse Write account password is as follows:
- In the SCOM console, click on the “Run As Accounts” view (found in the Administration workspace, under “Administration” > “Run As Configuration” > “Run As Accounts”).
- Select the appropriate Run As Account:
- If present, select “Data Warehouse Action Account”.
- If “Data Warehouse Action Account” is not present, select “Data Warehouse Report Deployment Account”.
- Click the “Properties” task.
- On the “Credentials” tab, enter the new password in both the “Password” and “Confirm Password” fields.

- Click “OK” to save.

With that, the Data Warehouse Write account’s password will be updated.
If you need to change the account being used entirely, read on….
How to Change the Data Warehouse Write Account Credentials Entirely
The steps to change the Data Warehouse Write account account to a whole new account are considerably more complex. As such, I’m going to break this up into phases.
Phase 1 – Configure the “Data Warehouse Action Account” Run As Account
As stated in the previous section, if, when SCOM is installed, the same credentials were provided for both the Data Reader and Data Warehouse Write accounts, SCOM will not create separate Run As Accounts for each role. Instead, it will store the supplied credentials in the Run As Account titled “Data Warehouse Report Deployment Account” and map that single Run As Account to all of the Run As Profiles for both the Data Warehouse workflows and Report Server workflows.
Therefore, in order to set a new account specifically for the Data Warehouse Write account role, a Run As Account must be created to contain those credentials and must be mapped to the appropriate Run As Profiles. Follow these steps to create and configure the Run As Account.
- In the SCOM console, click on the “Run As Accounts” view (found in the Administration workspace, under “Administration” > “Run As Configuration” > “Run As Accounts”).
- Click the “Create Run As Account…” task to launch the “Create Run As Account Wizard”.
- On the “General Properties” page, set the account type as “Windows” and the Display Name as “Data Warehouse Action Account. Optionally, enter the display name in the Description as well.
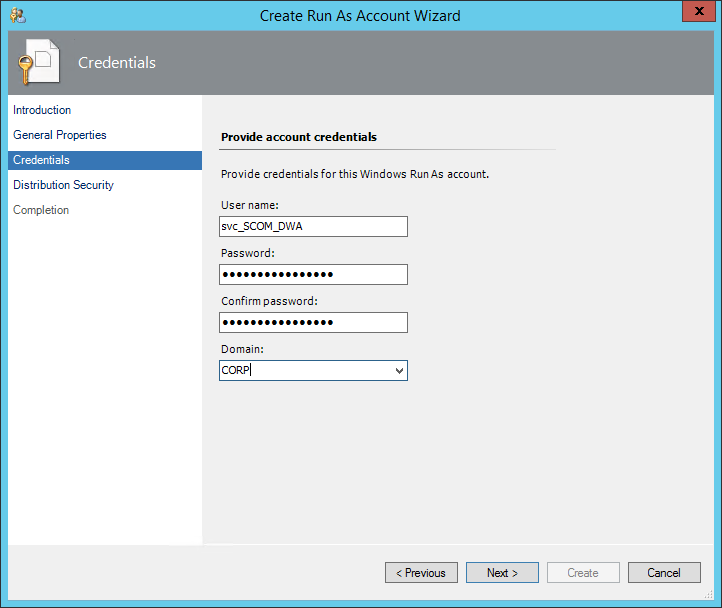
- On the “Credentials” page, enter the desired username, password, and domain information into the appropriate fields.
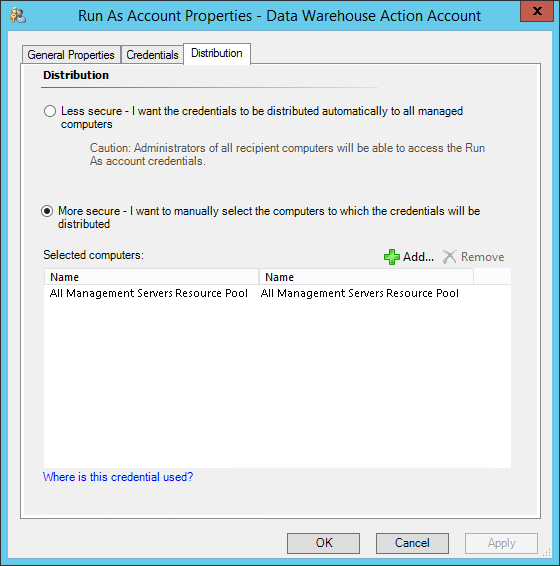
- On the “Distribution Security” page, select “More secure”.
- Click “Create” to create the account, then “Close” to close the wizard.
- In the same view, select the account you just created and click the “Properties” task.
- On the “Distribution” tab, click “Add” and add the “All Management Servers Resource Pool”.
- Click “OK” to save.


The Run As Account will have now been created. Proceed to Phase 2 to configure the Run As Profile.
Phase 2 – Configure the “Data Warehouse Account” Run As Profile
The next step is to configure the appropriate Run As Profile to use the new Run As Account. The Run As Profile tied to the Data Warehouse workflows is named “Data Warehouse Account”; this is the one we will want to configure. Follow these steps to configure this Run As Profile:
- In the SCOM console, click on the “Profiles” view (found in the Administration workspace, under “Administration” > “Run As Configuration” > “Profiles”).
- Select the Run As Profile named “Data Warehouse Account”, then click the “Properties” task.
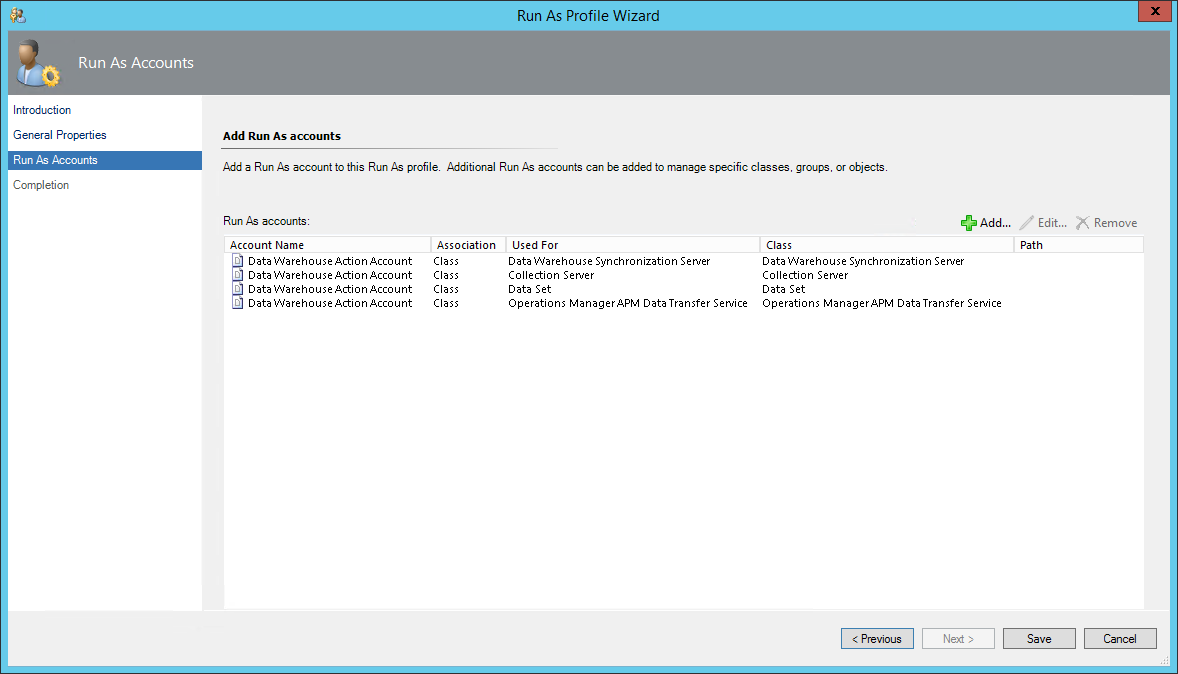
- On the “Run As Accounts” page, add a class-type association to the “Data Warehouse Action Account” Run As Account for the following classes:
- Data Warehouse Synchronization Server
- Collection Server
- Data Set
- Operations Manager APM Data Transfer Service
- Click “Save” to save, then “Close” to close the wizard.
The Run As Profile will now be configured to use the new Run As Account. At this point, we’ve updated the credentials SCOM uses to communicate with the Data Warehouse and SCOM will immediately begin using those credentials to connect to the Data Warehouse database. However, there is one final step that is required before that communication is successful.
Phase 3 – Update the Data Warehouse Database
Even though SCOM is now successfully using the new Data Warehouse Write account credentials, one step remains. This step was slightly trickier to figure out, so I’m going to include some of the errors that led me to it in case they help someone searching for the errors find their way to this post.
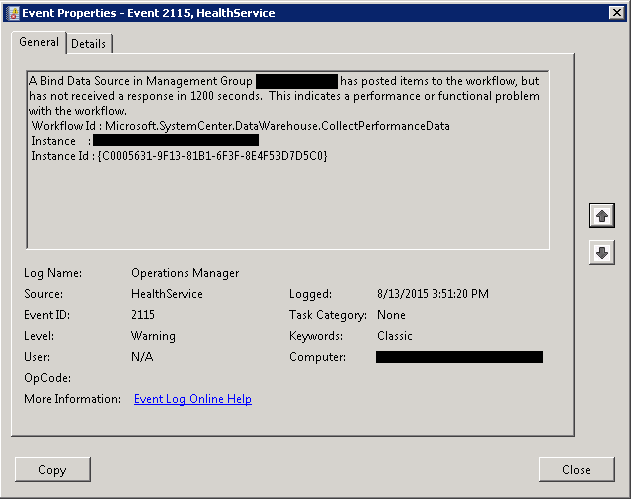
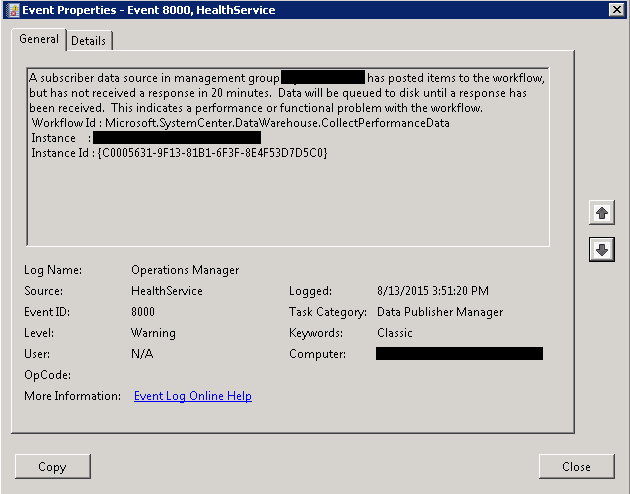
Initially, I had thought I was complete at this point. However, as I watched the Event Logs on the SCOM management servers, it quickly became clear that more was required. SCOM was regularly generating events with Event ID 2115 and Event ID 8000, showing that there was a problem with communication with the Data Warehouse.
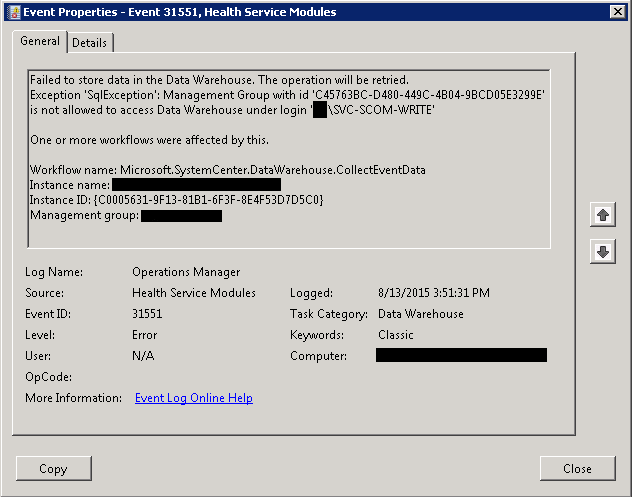
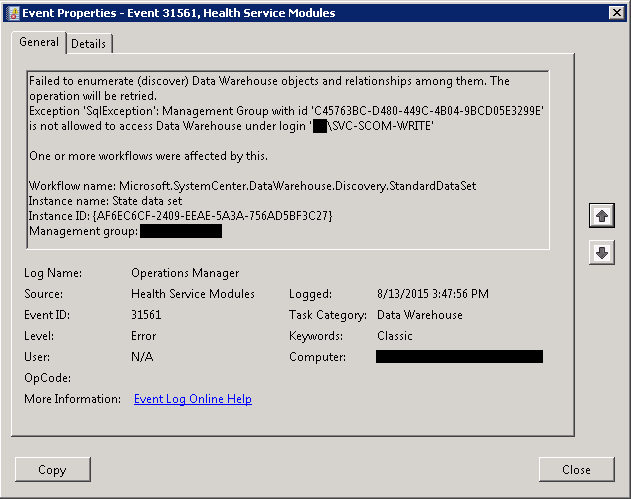
SCOM also began generating events with Event ID 31551 and Event ID 31561, both of which specified the same problem – the SCOM management group was “…not allowed to access Data Warehouse under login <new service account>”. Apparently, despite configuring the Run As Account and Profile, the new service account was being denied access to the Data Warehouse.
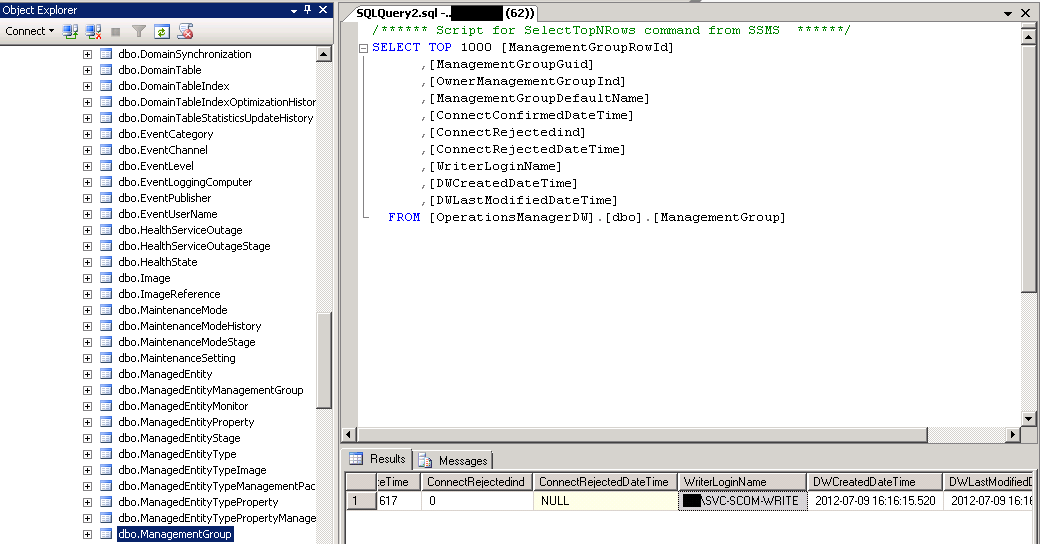
The first step in troubleshooting was to confirm that the account had the necessary permissions to access the database in SQL. That did not turn out to be the problem. Upon further investigation, though, I discovered that, when SCOM is deployed and the management group is initially connected to the Data Warehouse, the Data Warehouse database creates an entry in the table “dbo.ManagementGroup” for the management group. This entry includes the domain and username of the initial Data Warehouse Write account, and this listing is what ultimately grants permissions for the account to access the Data Warehouse.
A simple update to that table, adding the new service account’s domain and username, is all that is required to resolve the errors and fix the Data Warehouse workflows – no need to restart any services. The solution is simple once known, but nowhere within Microsoft’s SCOM 2012+ documentation is this referenced, at least as far as I can find.
To confirm the username currently stored in the Data Warehouse, as well as to confirm the change after performing it, run the following SQL Query against your Data Warehouse database. Note that if your Data Warehouse database was given a custom name, replace “OperationsManagerDW” with your Data Warehouse database’s name.
SELECT [ManagementGroupDefaultName],[WriterLoginName]
FROM [OperationsManagerDW].[dbo].[ManagementGroup]
In order to update the database, run the below SQL Query against your Data Warehouse database. Note that you should replace “DOMAIN\USERNAME” with your Data Warehouse Write account’s domain and username, replace “SCOM MANAGEMENT GROUP NAME” with the name of your SCOM Management Group, and if your Data Warehouse database was given a custom name, add that database name in place of “OperationsManagerDW”.
UPDATE [OperationsManagerDW].[dbo].[ManagementGroup]
SET [WriterLoginName] = 'DOMAIN\USERNAME'
WHERE [ManagementGroupDefaultName] = 'SCOM MANAGEMENT GROUP NAME'
After updating the database, check the event log on your SCOM management servers and confirm that the Data Warehouse workflows are completing successfully. If no new errors are generated, the process has been completed successfully.
Conclusion
This post has gone into detail regarding the method of updating and replacing the Data Warehouse Write account credentials in SCOM. As no official documentation exists to confirm or deny the steps above, I absolutely encourage everyone to test this in a non-production environment before making changes in your production environment. I’ve tested this several times in alternative SCOM environments myself and I have had no issues, however, if your experiences differ, please reach out and let me know! Until such time as Microsoft does produce official documentation on this process, my hope is that this blog post helps others who find themselves in the same situation I was in, and if changes need to be made to account for anything encountered by others, I’ll be glad to make them.
Good luck out there, and Happy SCOMming!