I recently had the opportunity to work with Windows 8.1 Embedded (Industry Pro) for the first time in my career. The project was to create a custom image that could be managed by SCCM 2012 R2, versus the OEM image configured to use the manufacturers management tools.
As I do with all my build and captures, I set my target on MDT 2013. I quickly realized that the default Unattend.xml templates that are provided with MDT needed to be modified in order to add the Unified Write Filter feature. *Note, you could add this feature as well in your deployment process versus your reference image.
The following steps outline creating a new catalog file/Unattend.xml for Windows 8.1 Embedded using Windows System Image Manager( Windows SIM) for deployment with MDT.
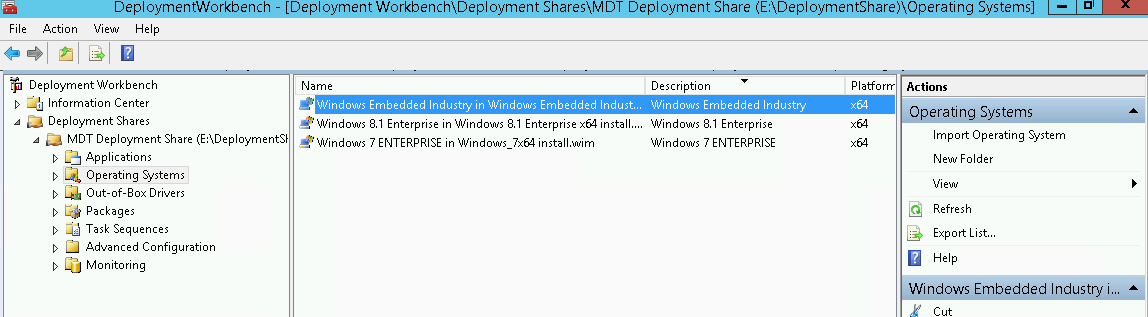
Step 1: Import the OS into MDT using the MDT Workbench.
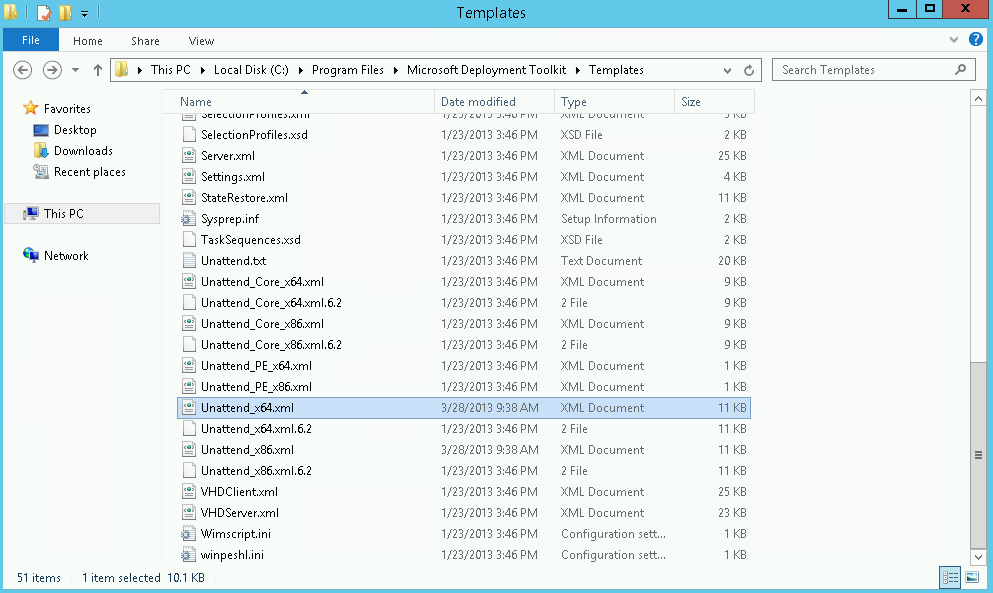
Step 2: Copy Unattend_64.xml or Unattend_x86.xml (depending on the architecture of your Windows embedded of course) from the MDT templates directory (C:\Program Files\Microsoft Deployment Toolkit\Templates) into a temporary location.
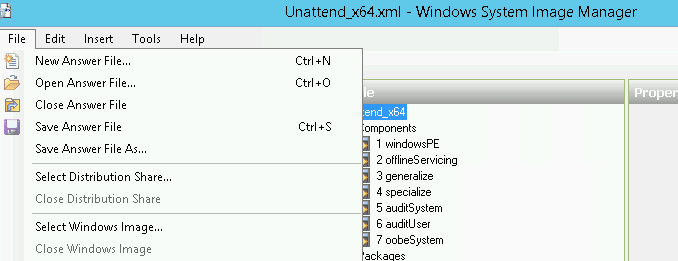
Step 3: Launch Windows SIM (Included in Windows ADK)
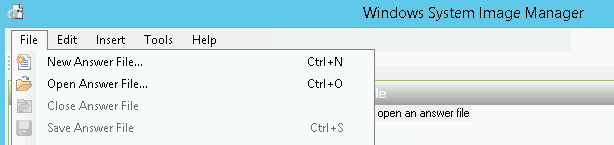
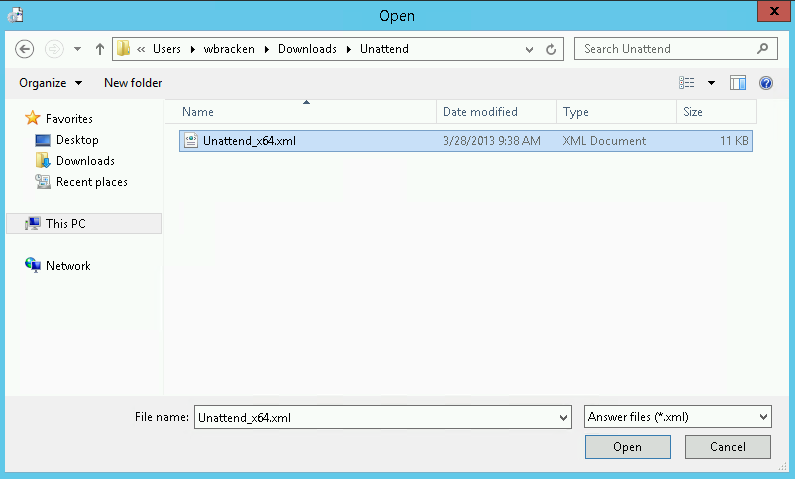
Step 4: Open the Unattend_64/86.xml file.
Step 5: From the Menu, click File > Select Windows Image
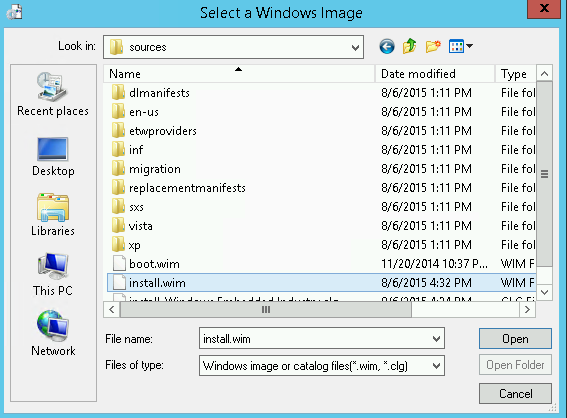
Select the install.wim from the Windows 8.1 Embedded source directory. (%DeploymentShare%\Operating Systems\Windows Embedded Industry x64/x86\sources\install.wim)
You will be prompted to create a new Catalog. Select yes
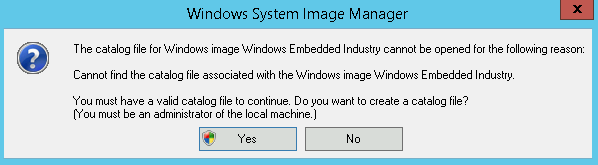
This process will take several minutes to complete!
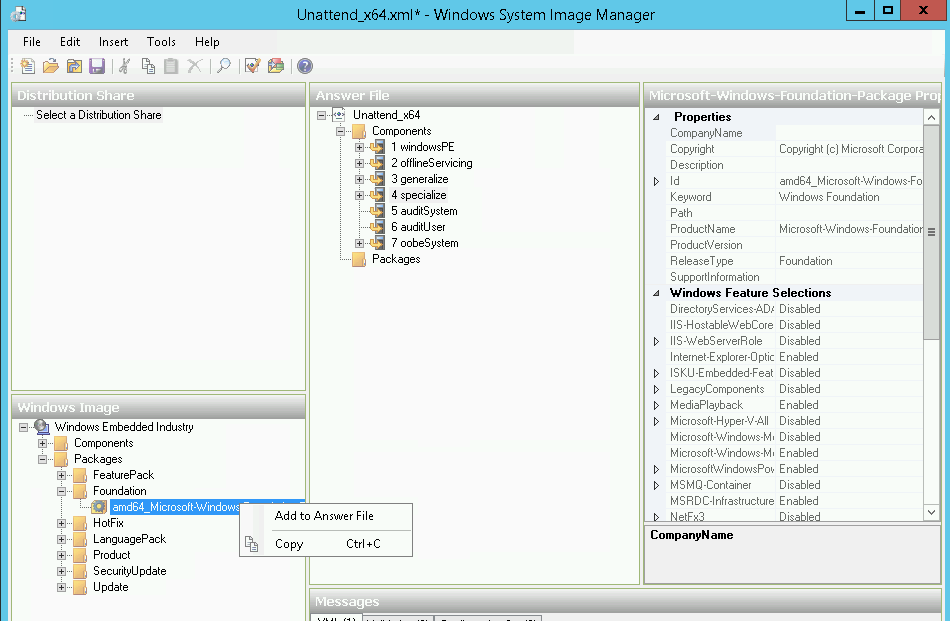
Step 6: Add Microsoft Windows Foundation option to the Answer File.
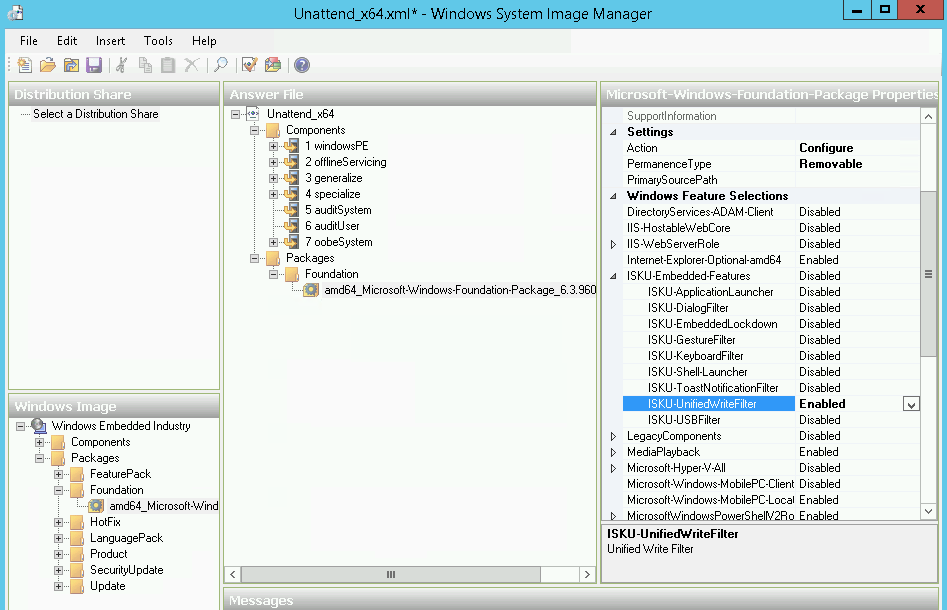
Step 7: Set the ISKU-UnifiedWriteFilter feature to Enabled
Step 8: Click File > Save as, then save the file in a temp location as “Unattend.xml”
Step 9: From the MDT Workbench, create a new Standard Client Task Sequence for your Embedded Build and Capture process.
Step 10: Navigate to the %DeploymentShare%\Control\TaskSequenceID directory (where TaskSequenceID = the ID you specified when creating your task sequence) and open the default Unattend.xml in Notepad.
Step 11: Open the newly created Unattend.xml (from the temp directory) in Notepad.
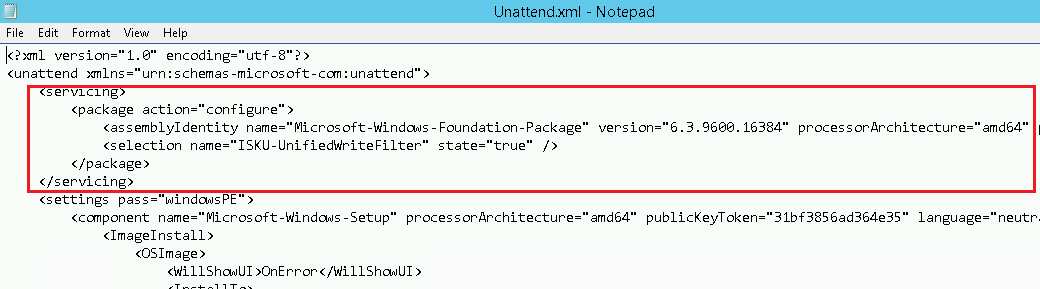
Step 12: Copy and paste the Servicing section from the temp Unattend.xml into the default Unattend.xml located in the Deployment share directory.
Step 13: Save the Unattend.xml
You are now ready to Build and Capture your Windows 8.1 Embedded with the write filter feature via MDT 2013.
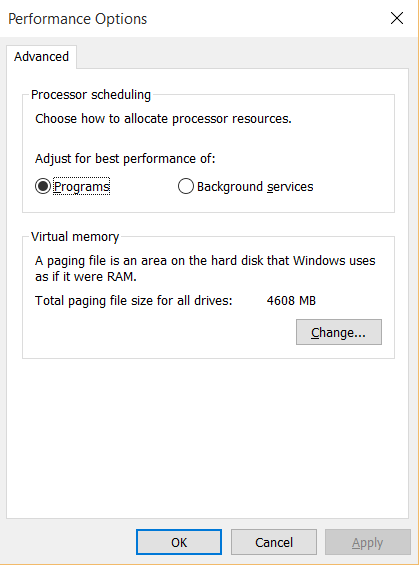
Important note, if you add this feature to your reference WIM you will need to disable the pagefile as well. If you don’t, you will be greeted with this lovely dialog on each boot up of the machine when the write filter is enabled:
 l:
l:
This can easily be accomplished however with a bit of PowerShell in your task sequence.
Step 1: Create a new PowerShell script with the following content and save to the “%DeploymentShare%\Scripts” directory:
<#
.Synopsis
    This PowerShell script disabled Automatic Managed Pagefile and
    deletes and existing pagefile.sys.

.Example
    # Run on the current computer
   <script name>
#>

$ComputerSystem = Get-WMIObject Win32_ComputerSystem
if ($ComputerSystem.AutomaticManagedPagefile)
{
    $ComputerSystem.AutomaticManagedPagefile = $False
    $ComputerSystem.Put()
}

$PageFileSetting = Get-WMIObject Win32_PageFileSetting
if ($PageFileSetting)
{
    $PageFileSetting.Delete()
}
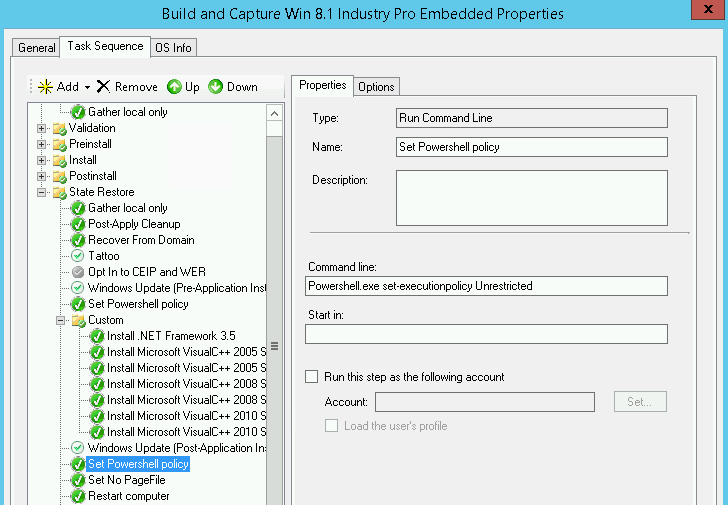
Step 2: Create a new Run Command Line Task in the State Restore Phase of your Task Sequence to set the PowerShell Execution Policy to Unrestricted:
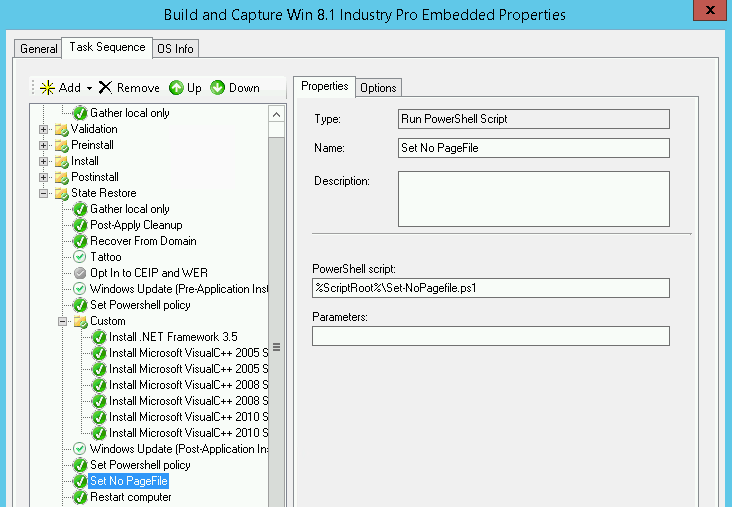
Create a Run PowerShell Script Task just below the previous step and point to %ScriptRoot%\yourpagefilescript.ps1 script:
Your reference image will no longer contain a pagefile when you deploy it, let’s say with oh…System Center Configuration Manager 2012 R2, which fully supports all features of SCCM on Windows Embedded, with exception of Power Management. 🙂
That’s all for today. Happy building!